


The Tallinn top and dress from Itch to Stitch patterns is named after the capital of Estonia. I have substantially upped my geography game with the names of Itch to Stitch patterns!

This lovely pattern was released on the 20th of February (my birthday!). I had gotten back home from a fabric shopping spree my awesome hubby treated me to and was notified via the Itch to Stitch newsletter about this new pattern. This was the icing on the cake.. literally… and I purchased this pattern for myself for my 41st birthday.

The pattern has three views. The all have the front and back princess seams, center front seam, scoop neckline with binding and long sleeves. View A is a peplum top with a waist seam. View B is a top with mid hip length and View C is a flared dress with above the knee length on a 5ft 6″ woman.
Designed for 2 way stretch knit fabric with 75% horizontal and vertical stretch such as: french terry, DBP, ITY, interlock and jerseys.

This is the first knit pattern from this brand that includes a full bust option for those whose high/full bust difference is 3″ or above. This will likely provide a better fit and no need to do a full bust adjustment. I am a C cup and never need specific bust adjustments, so I chose the standard bust option.
I chose a size 14 (standard bust )according to my body measurements and set out to make a quick muslin from Ponte roma scraps… I knew this fabric DID NOT have the recommended stretch, but I wanted to assess the princess seam curves, shoulder fit and waist height on my body. Having this muslin more fitted than intended would not affect that. When I had the muslin on my body, I drew a new neckline that was lower for the dresses I had planned to sew. I didn’t need fit adjustments. YAY

I made the neckline as per the pattern and the binding with contrast black fabric of the same weight following the pattern instructions. This technique involves stitching in the ditch. This gives the top a clean, elevated look and feel. I made this little top sleeveless and finished the armscye and hem with the same binding technique as the neckline. This is a View B, sort of… shorter (scrap busting at it’s best).
I transferred the new neckline shape to the pattern piece and cut my two dresses.
My first Tallinn dress is made with a colorful ITY I fell in love with. I decided to finish this neckline with a different technique. I have actually done this before with a lace Isidro Top, also from Itch to Stitch. See below 🙂

For this look, I resort to a cool leather look jersey I have found locally. It’s structured and easy to manipulate. It can also be put through a bias tape maker. I managed to take the composition information at the shop and it’s 92% Poly and 8% spandex with a weight of 9oz/yard or 250g/meter.
I cut the binding pieces 3.3mm (1 1/4″) wide by 90% of the circumference of the neckline and armholes and put them through the 18mm bias tape maker. Works a charm and I have “double fold” jersey binding.

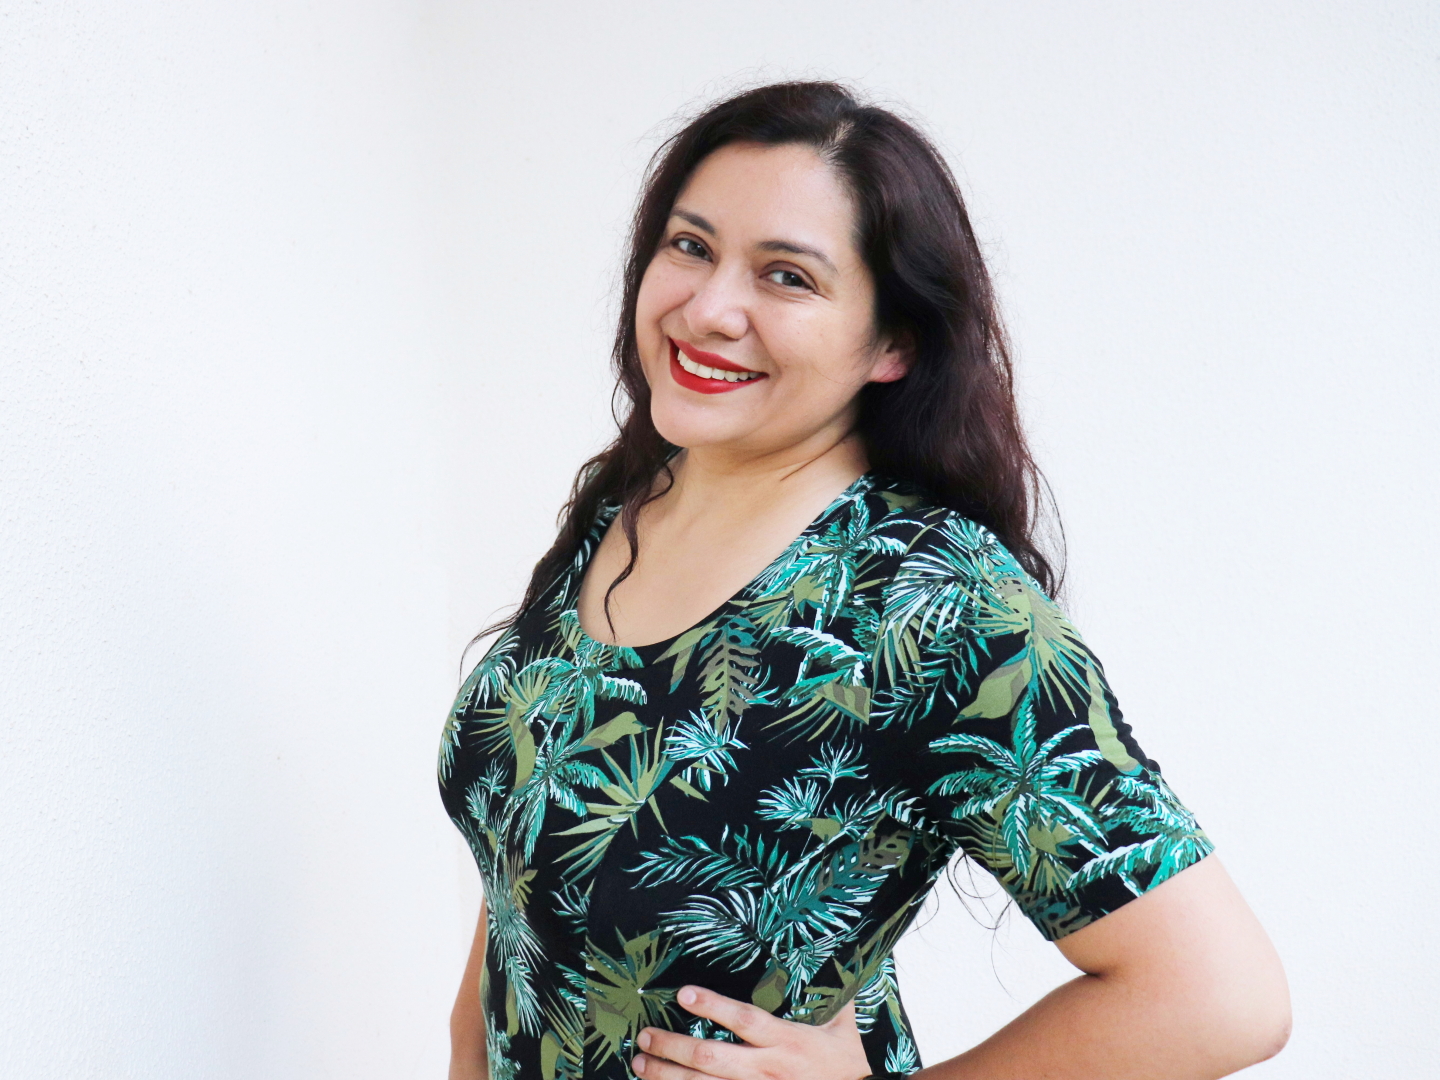
For my second Tallinn dress, I chose a beautiful rayon spandex (95% rayon, 5% spandex, 7.5oz/yard) with a tropical print and decided to use the same lower neckline as the dress above. I opted to use a traditional neckband. This is the fastest and easiest way yo finish a knit neckline neatly.
I have a standard width of 2″ for my neckbands and the length I like to use for rayon spandex is 80-85% of the total neckline circumference.

Although the two dresses are cut exactly with the same neckline and total length, the tropical green rayon/spandex version feels looser, longer and the neckline deeper than the red print ITY. This is due to the nature of the fabric type. Both are equally comfortable.
[DISPLAY_ULTIMATE_PLUS]
Of course this post also has a video from my channel. In this video, I have practical sewing footage of these three neckline finishing techniques and you can see the garments on too. Have a look below:
The post and video aims to complement each other.
General fit adjustments I made for these garments:
- Muslin: it’s a View B crop top, about 2″ longer than the waistline. Not intentional but due to the scraps available.
- Dresses: Lower neckline, lengthened the skirt pieces at the shorten/lengthen line by 2″ to account for the height difference (I am 5ft 8″).
- Shorter Sleeve: I decided on a sleeve length where the pattern has a shorten and lengthen line and added a 1″ hem allowance. I trued the seams to have a neat hem with no puckers.

I love the all. Lets see some pics. Disclaimer: it was pouring rain, dark and muddy. These are the best I could do.
View B, cropped (the muslin)


[DISPLAY_ULTIMATE_PLUS]
The red print ITY sleeveless dress with leather look binding:


The tropical green rayon/spandex dress with short sleeves and a neckband:


Would I recommend this pattern? a billion times yes. The fit is amazing and spot on, the instructions are super clear and helpful and the techniques used are top notch.
Tallinn Top & DressWould I make more? Of course. I have a vision of color blocking and using the center front seam the pattern has to facilitate this. The peplum top is also pending the right fabric pairing.
Tallinn Top & DressDISCLAIMER: I purchased my own pattern and fabric for this project, post and video.
I have affiliate links in this post to the pattern company and the pattern. If you click on these links, at no cost to you, I receive a small commission that helps finance my sewing, blog and Youtube channel.
HOW TO SUPPORT MY WORK:
I spend a lot of my time sewing, filming/editing videos, writing and taking photos for both my Youtube channel and blog and if you love what I do and consider my work valuable for your own sewing, you can support me financially in a non-committal manner by purchasing me a ”coffee” through Ko-Fi here. $3 gets me one cup of “coffee”.

Did you love this post?
Your generous donation supports the cost required to keep sharing sewing tips and resources with you. Thank you.
$5.00

Categories: Pattern hacks, Pattern Reviews, Sewing techniques
I’m excited to give this dress a try! For clarification, would the fabric required be a 4 way stretch? Description says “Designed for 2 way stretch knit fabric with 75% horizontal and vertical stretch”. Maybe I’m confused. Can you clarify? Thank you!
Hi Marcy. The 2 way or 4 way can be the same depending on who is writing or reading. In my opinion (and also of many others), 4 way doesn’t really exist. Two way is horizontal and vertical stretch. 4 way is the “same”… horizontal, right and left, and vertical, up and down. In essence, this pattern requires fabric that stretches horizontally and vertically.
Some may call that 4 way, other might call that 2 way 🙂
your scalloped edge lace is amazing. Do you have a source for that?
My source is local and there’s no link for it.